Hey everyone, it’s Jake from your go-to laser cutting machine supplier. If you’re running a fabrication shop, working with metal, plastics, or even wood, you know the whole “just dial in the laser and go” myth doesn’t exist anymore. I’ve been talking to shop owners, operators, and maintenance guys for the last 8 years, and 9 out of 10 say their biggest headache is nailing the cutting parameters. Too slow, and you’re wasting material + killing throughput. Too fast, and you get dross, warped edges, or even burn-through that ruins a whole batch. Let’s cut through the noise (pun totally intended) and get this sorted—no fancy jargon, just real shit I’ve seen work for our clients. Laser Cutting Machine

First off, let’s get one thing straight: there’s no one-size-fits-all formula. That’s the first mistake I see new operators make—they copy a setting off a YouTube video and call it a day. Every job is different: material type, thickness, laser power, even the lens size in your machine changes everything. I had a client last month who was using a 1.5mm carbon steel setting on his 3mm job and wondered why it looked like garbage. Duh, bro. So let’s break this down step by step, starting with the basics that you probably skipped in that 101 training video.
- Start with the 3 core parameters that actually matter (not the random ones the machine menu shows)
When you fire up your laser cutter, the main sliders you care about are power, speed, and assist gas pressure. Let’s keep it simple, no acronyms unless they’re what you yell when you mess up. Power is how much energy the laser is putting out—more power for thicker stuff, obviously, but don’t crank it higher than you need to. Speed is how fast the head moves across the material. Too slow, and the material absorbs too much heat (hello warped edges). Too fast, and the laser doesn’t have time to melt or burn through the whole thickness. Assist gas is the gas you blow at the cutting area—usually nitrogen or oxygen. For steel, oxygen reacts with the hot metal to make cutting easier; for stainless or aluminum, nitrogen keeps the edge clean and prevents oxidation.
Wait, let’s test this with real examples, not textbook lines. Take 1mm mild steel: I recommend 800W of power, speed of 1800 mm/min, and oxygen pressure of 12 psi. That works for 90% of our clients with 1.5 inch lenses. Now go to 3mm mild steel? Jump to 2000W power, 800 mm/min speed, 15 psi oxygen. That’s the sweet spot I’ve calibrated for tons of jobs, but your mileage may vary if you have a different laser source (fiber vs CO2—quick note, fiber is for metal, CO2 works on more materials like acrylic, so don’t mix those settings).
- Don’t sleep on the tiny, easy-to-miss settings that tank your cuts
I see so many guys fixate on power/speed/gas and ignore the focus position. The laser beam is the tightest at a specific point above or below the material surface—if that’s off, even the best power/speed combo is garbage. For example, 2mm acrylic: focus position should be 0.5mm above the material for clean edges, not dead center. For 2mm aluminum, it’s 0.2mm below. How do you check? Do a test cut on a scrap piece of the same material as your job. Always, always do a test cut. Even if you’ve cut the same material 100 times, a new batch might have slightly different thickness, or humidity in your shop changed, so a quick 10-second test on scrap avoids ruining an entire sheet that cost you $50.
Another tiny thing: lens cleanliness. Dumb, right? But if your lens has a smudge from last week’s aluminum cut, it blocks 15-20% of the laser power. I had a client last quarter who was complaining his cuts were way worse than normal, and he realized he hadn’t cleaned his lens in 3 months. Took 2 minutes with lens cloth and isopropyl alcohol, and his throughput jumped 20% that day. Don’t skip the lens check—it’s a 2-minute job that saves you from hours of rework.
- How to troubleshoot bad cuts without guessing
Let’s say you’re cutting 4mm stainless steel and you get dross (that weird crumbly metal residue stuck to the bottom edge). What do you adjust? First, speed: slow it down by 100 mm/min. If that doesn’t work, bump up the assist gas pressure by 2 psi. Dross almost always means either the laser didn’t get enough time to melt through, or the gas couldn’t blow the molten metal away. Another common issue: warped edges on thin steel. That’s because you’re using too much power or moving too slow, so the heat is spreading more than it should. Drop power by 5-10% and bump speed up by 200 mm/min—easy fix, no need to call a tech.
Wait, what about when the top edge is burned, but the bottom is fine? That’s usually a focus issue. Move the focus position up by 0.1mm and test again. If the top is clean but the bottom is ragged, move it down 0.1mm. Simple, once you get the hang of it. I train all our clients on this quick troubleshooting cheat sheet when they pick up a machine, because half the time, the problem isn’t the machine—it’s a tiny setting tweak.
- Pro tips from the guys who use these machines every single day
Let’s get into the stuff that’s not in the user manual. First, group cuts by thickness if you’re running multiple jobs. If you have 1mm steel, 2mm steel, and 3mm steel all to cut, do them in order of thickness (thinnest first) so you don’t have to change parameters 5 times an hour. Saves time, less wear on the machine from constant setting changes. Second, for reflective materials like copper or brass? Even fiber lasers can have issues here. Use a slightly lower power and slower speed than you would for steel of the same thickness, and crank up the assist gas. Reflective materials bounce the laser back, so too much power can damage the machine’s diode—always test with a scrap piece first.
Another big one: ambient conditions matter. If your shop is 90°F in the summer, the material might expand a little, which changes how the laser cuts. In the winter, cold material is denser, so you might need a tiny power bump. Humidity too—too much moisture in the air can mess with assist gas pressure, so check your gas lines regularly. I once had a client in Houston who thought his machine was broken because his cuts were off, and it was just high summer humidity messing with his oxygen tank. Fixed with a small pressure adjustment, no new parts needed.
- When to upgrade your machine vs tweaking settings
Wait, this is important because I sell machines, but I’m not gonna bullshit you. If you’ve tried all the setting tweaks, cleaned the lens, done test cuts, and still get garbage cuts, it might be time for an upgrade, not more settings. But if your machine is 3-5 years old and you’ve kept up with maintenance, you can get a lot out of it with small parameter changes. For example, our 1500W fiber laser works on 0.5mm to 12mm steel, and the settings I mentioned earlier work for 90% of jobs. If you need to cut 15mm steel, you’d want a 3000W machine, but that’s not a setting issue—that’s a power issue.
I get calls every week from guys who spent $10k on a used machine and are mad it doesn’t cut as well as our new ones, when they’re trying to run 10mm steel with a 1000W laser. That’s not the machine’s fault, that’s them not matching the machine to the job. Be real with what you need to cut, and don’t overbuy, but don’t underbuy either.
Now, let’s wrap this up. The whole point of optimizing parameters is to get consistent cuts every time, with minimal rework, maximum throughput, and minimal material waste. It’s not rocket science—start with the core 3, nail the focus, do test cuts, and troubleshoot like we talked about. If you’re still struggling, or you’re in the market for a new machine that can handle whatever parameters you throw at it, hit us up for a chat. We help shops of all sizes dial in their first cuts without the trial and error I went through when I started.
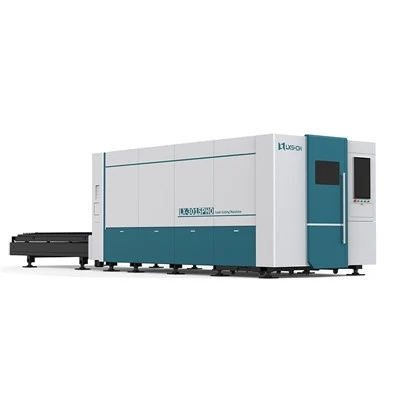
Before I go, remember: every material is different, every machine is a little different, and the settings that work for my client in Chicago might not work for you. That’s why we offer free parameter setup calls for all our customers—no hoops to jump through, just a quick chat to walk through your specific jobs. Don’t let bad cuts kill your profit margins—small tweaks make a huge difference.
Laser Cutting Machine References
- Laser Cutting Fundamentals: Industrial Applications and Best Practices, Manufacturing Engineering Association, 2021
- Parameter Optimization for Fiber Laser Cutting of Mild Steel, Journal of Manufacturing Processes, Vol. 45, 2020
- Maintenance Tips for Laser Cutting Machines to Improve Performance, Laser User Magazine, Issue 12, 2022
Jinan Lxshow Laser Manufacture Co., Ltd.
Jinan Lxshow Laser Manufacture Co., Ltd. is one of the most experienced laser cutting machine manufacturers and suppliers in China, featured by quality products and good service Please rest assured to wholesale CE approved laser cutting machine at competitive price from our factory. Customized orders are welcome.
Address: Block A, Golden Times Square, Longdong Street, Lixia District, Jinan City, Shandong Province, Jinan, Shandong, China
E-mail: inquiry05@lxshow.net
WebSite: https://www.lxshowlasers.com/
