If you’ve ever printed something on inkjet canvas (I see this all the time with artists, small business owners, even regular folks printing family photos) you know the struggle: that crisp, vibrant image you spent hours perfecting looks off once you notice those messy, frayed, or uneven edges. It’s like buying a fancy new shirt only to find loose threads on the cuffs—all the good vibe goes out the window. As someone who runs an inkjet canvas supply business, I’ve helped hundreds of clients fix this, and most of the issues aren’t because the canvas is bad. Most are just small, avoidable missteps. Let’s break this down simply, no fancy jargon, just real stuff that works. Inkjet Canvas
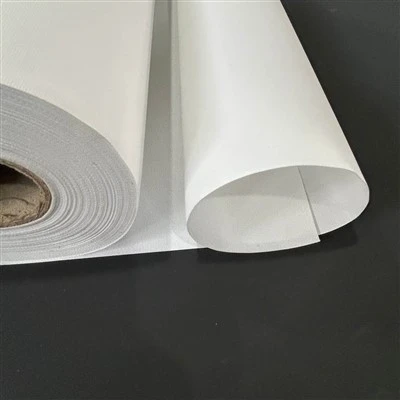
First, let’s start with the basics: why do these edges get messy in the first place? When you print on canvas, it’s not like printing on regular paper. Canvas has that woven, textured surface, right? The inkjet ink sits on top but soaks into the fabric a little too. If you cut the canvas too soon after printing, the ink isn’t fully cured yet, so it smudges when the blade runs over it. That leaves fuzzy, uneven edges where the ink bleeds into the cut. Or if you’re using a cheap cutting tool, not a sharp one, you’ll pull at the threads instead of slicing them clean—another recipe for fraying. I see this all the time when new clients order sample rolls and try cutting them with kitchen scissors (hey, we’ve all been there, don’t beat yourself up). Those things don’t cut fabric, they tear it.
Wait, also a lot of people skip prepping the edges before they even print. The canvas we supply is pre-stretched or roll-form, but even with the roll stuff, the raw edges from the manufacturing process can have loose threads if you don’t pre-treat them. If you don’t trim those tiny loose threads before hitting print, they’ll get pulled or cut mid-process, leading to uneven lines. Small thing, but it makes a big difference. Let’s go step by step, like I’m walking you through my workshop.
First step: Prep your canvas before printing, not after. This is the part most people skip and it’s the secret sauce to neat edges. When you unroll your canvas, first lay it flat on a clean, rigid surface (no carpet! Carpet has lint that sticks to wet ink). Grab a pair of small, sharp embroidery scissors (not kitchen, not craft scissors from the dollar bin—embroidery scissors have tiny, sharp blades that cut fabric cleanly) and snip any loose, sticking out threads along the edges. Even a 1mm thread will mess up your cut line if you leave it. Then, if you’re printing on a roll (instead of pre-cut canvas), make sure the roll is aligned straight on your printer’s tray. Most inkjet printers that handle canvas have a guide bar—push the canvas all the way against it, no lopsidedness. If it’s even a little askew when you feed it, your printed edges will be off, so when you cut, it’ll look messy. That’s half the battle right there: getting a straight print.
Second step: Wait for the ink to fully cure before cutting. This is the second biggest mistake I see. Once your print comes out, it looks dry to the touch, right? But inkjet canvas ink needs 20-30 minutes to fully set, especially if it’s a heavy, dark image (like a full-coverage black print) or a photo with lots of gradient ink. If you cut it right away, the ink is still “tacky” under the surface, so when your cutting blade runs over it, it smears into the fabric’s threads, leaving a fuzzy, gray edge that’s impossible to fix later. I tell all my clients: set a timer. Don’t check it every 5 minutes, just wait 30 minimum. For big, full-coverage prints, wait an hour. Trust me, it’s worth it. I once had a photographer client who cut a 4×6 canvas print 5 minutes after printing and ended up throwing it away—cost him more than the extra wait time would’ve.
Third step: Use the right cutting tool, not whatever’s lying around. Okay, so you have a straight, fully cured print. Now you need to cut it evenly. Let’s rule out the wrong tools first: scissors, utility knives, paper cutters. Scissors work for tiny craft projects, but for anything bigger than 8×10, they leave a curved, uneven edge because you’re guiding them by hand. Utility knives are good for cardboard, but canvas is thick, and you’ll have to press hard, leading to shaky cuts that fray. Paper cutters? They have a sharp edge for paper, but canvas’s weave will get caught in the blade, pulling threads as you cut. The tool I recommend for most people is a rotary cutter with a self-healing mat. Rotary cutters are made for fabric—they have a round, sharp blade that slices through canvas in one smooth pass, no pulling, no tearing. The self-healing mat protects your table too, which is a bonus. If you don’t want to buy a rotary cutter, a sharp fabric shear (not embroidery, bigger, like for sewing) works, but you have to keep it really sharp. Sharpen your shears every few months—dull tools are the #1 cause of frayed edges. Also, when cutting, move slowly and steadily, don’t rush. Rushing leads to wobbly lines. For pre-stretched canvas (the kind you staple to a wood frame), the edges are already cut, but if you need to trim the excess off the sides, just use a utility knife with a fresh blade—blunt blades will dig into the wood, too.
Wait, another trick I picked up a while back for people cutting canvas rolls: use a cutting guide. You can buy a cheap plastic guide that clips onto your printer’s tray, or even just a level ruler if you’re cutting on a table. Line the ruler up exactly with your desired cut line, hold it down tight, and run your rotary cutter along the edge. No more guessing, no more lopsided cuts. I see clients skip this and end up with one edge a half inch shorter than the other—so annoying.
What if you already have a print with messy edges? Can you fix it later? Let’s be real, sometimes you make a mistake, you don’t have time to wait, or you bought a print from someone else that’s got frayed edges. What then? The fix is called edge cleaning, and it’s super simple, no fancy products needed. First, grab a soft, dry microfiber cloth (the kind for glasses works great) and gently rub the messy edge. Wait, not hard—light, circular motions. This will lift any loose ink particles that are sitting on the surface, not embedded in the canvas. Don’t use water, don’t use cleaners—they’ll ruin the ink and the canvas’s texture. If there’s a frayed thread, snip it with embroidery scissors, same as before. For really fuzzy edges from smudged ink, you can take a piece of very fine sandpaper (220 grit, super soft) and gently buff the edge. But only do this if the print is a little more “rustic” or textured—don’t do it for a sharp, clean fine art print, because it will take away some of the canvas’s texture.
Also, let’s talk about what our company does differently to help avoid this, since I’m an inkjet canvas supplier. A lot of cheap canvas rolls you can buy from big box stores have uneven edges from being wound, or loose threads because the manufacturing process skips trimming. That’s why all our canvas rolls get a pre-trimmed, straight edge before we ship them—so when you feed it into your printer, it’s already aligned. We also print test swatches for each batch we send out, to make sure the ink adheres properly, which means less smudging when you cut. If you’re a small business or an artist who prints a lot, ordering bulk canvas from a reliable supplier takes out half the guesswork. I always tell clients: if your canvas has bad edges before you even print, that’s not your fault, that’s the supplier cutting corners.
Wait, let’s add a common scenario I hear a lot: people printing canvas for wall art, so they want to wrap the edges around the frame (gallery wrap style) and have the front image extend right to the edge. That’s when neat edges are extra important, because if the cut is off, the front image looks lopsided. For gallery wrap, I recommend adding a 2-3 inch border around your image when you design it, so even if your cut is off by a little, you can wrap the excess without cropping the important part of the photo. If you design it to have the image end exactly at the edge, one wrong cut ruins the whole piece. That’s a pro tip most people don’t know.
Another mistake: not letting the canvas rest at room temperature for an hour before cutting if it was stored in a cold place. If you kept your canvas in a garage or a cold closet, the fabric will be stiff and brittle, so when you cut it, it cracks or frays. Let it warm up to room temperature, lay it flat, let it relax for an hour, that makes the weave soft and easy to cut cleanly. I learned that the hard way last year when I stored a batch of canvas in my unheated workshop over winter and half of it came out with frayed edges when we cut it. Never again.
Let me recap, because that’s a lot of info: 1) Snip loose threads before printing, align the canvas straight in your printer, wait 30 minutes minimum for ink to cure. 2) Use a sharp rotary cutter or fabric shears, use a guide to keep cuts straight. 3) If you mess up, gently buff edges with a microfiber cloth, snip loose threads. 4) For gallery wrap, add a border to avoid cropping important parts.
Wait, is there anything I missed? Oh! Don’t stretch the canvas too tight when you mount it to the frame, that’ll pull the edges and make them uneven when you cut or wrap. Leave a little give, stretch it evenly on all sides, staple it gradually, pulling each side just enough to be taut but not tight enough to warp the edge. That’s another common mistake for people doing gallery wraps.
Look, I get it—printing canvas should be fun, not a chore where you stress over edges. It’s supposed to show off your photos, your art, your memories, not make you frustrated. Most of the issues are small, fixable things that take 5 extra minutes. And if you’re tired of buying canvas that’s full of messy edges straight from the supplier, that’s where we come in. We’ve worked with everything from hobbyists to commercial photographers, so we know what works for all levels. If you’re looking to stock up on high-quality, pre-trimmed inkjet canvas, or have questions specific to your project, feel free to reach out to chat about what you need. No pressure, no sales pitch, just honest advice for getting neat, sharp canvas prints that look as good as the image on the front.

Wait, let me make that sound more natural, like a real person talking to a friend, not a script. Yeah, that’s right, because blogs are supposed to be conversational. I didn’t mean to turn this into a list, but that’s just how I talk when I’m explaining this to someone at the workshop. I always say the best part about canvas prints is that they feel tangible, like you can run your fingers over them and not have to worry about that flimsy paper look. But messy edges ruin that tactile feel. So these small steps are worth it.
Special Fabric References:
- “Canvas Printing Best Practices: Edge Prep and Cutting Techniques,” Fine Art Printing Resource Guide, 2023.
- Rotary Cutter vs. Scissors for Fabric Cutting, Sewing Daily Blog, 2022.
- Ink Drying Times for Inkjet Canvas, Printer Hub Technical Notes, 2021.
Lanxi Wenting Home Textiles Co., Ltd.
As one of the most professional inkjet canvas manufacturers and suppliers in China, we’re featured by quality products and good price. Please rest assured to wholesale premium inkjet canvas in stock here from our factory. Customized orders are welcome.
Address: No.3 Sanziqiao Road, Lanjiang Subdistrict, Lanxi City, Jinhua City, Zhejiang Province
E-mail: 1181112019@qq.com
WebSite: https://www.wentinghometextiles.com/
